Part 1 - Building an automated pet feeder for $50.00
August 09, 2020 | #iot | #aws | #pet-feeder

As a fun way to break into IoT, I decided to automate a simple task - feeding our cat!
Overview
My wife and I have one animal, Kneesox, our Cornish Rex cat. She's kind of a big deal and brings us both an incredible amount of joy. Like any other cat, Kneesox loves to eat and if given the opportunity, would glady overindulge herself. Some cats are fine with free-feeding (having a constant supply of food available), however, she started to gain weight and we had to re-evaluate our options.
After much research, we decided that the best option was to switch to meal feeding her, with a schedule of two meals per day at 7:30 AM and PM. As an aside, Kneesox's portion is only 2TBSP! With the adjustment in place her weight quickly settled back to an appropriate amount for her size. We decided that I would handle her morning routine and my wife would take care of the evening.
With our new roles in place, I quickly realized how unreliable I was at this simple task. Some mornings I would wake up late and Kneesox would be waiting at our bedroom door, letting us know that she was ready for breakfast! Other times, I'd head downstairs and walk right past her bowl.
I knew that we needed an automated feeder.
Being quite the cat-enthusiast, my wife had already performed quite a bit of research on this topic. Commercial feeders range anywhere from $75.00 to $300.00 for a quality feeder. The feature set offered seemed fairly basic, so I set out to see if anyone had tackled this project. Of course, dozens of hackers and makers had shared their work on both YouTube and GitHub which gave me some incredible inspiration.
The hardware
Here is an overview of the hardware used in this project:
| Hardware | Cost |
|---|---|
| Cereal Dispenser | $15.00 |
| * Stepper Motor | $28.00 |
| Coupler from motor to wheel | $7.22 |
| Stepper motor drive controller | $8.00 |
| ESP8266 micro-controller | $6.00 |
| * 12V to 2V adapter | $13.00 |
NOTE: A cheaper stepper motor could be used and the 12V to 2V adapter can be substituted out if powered by regular batteries.
Assembly
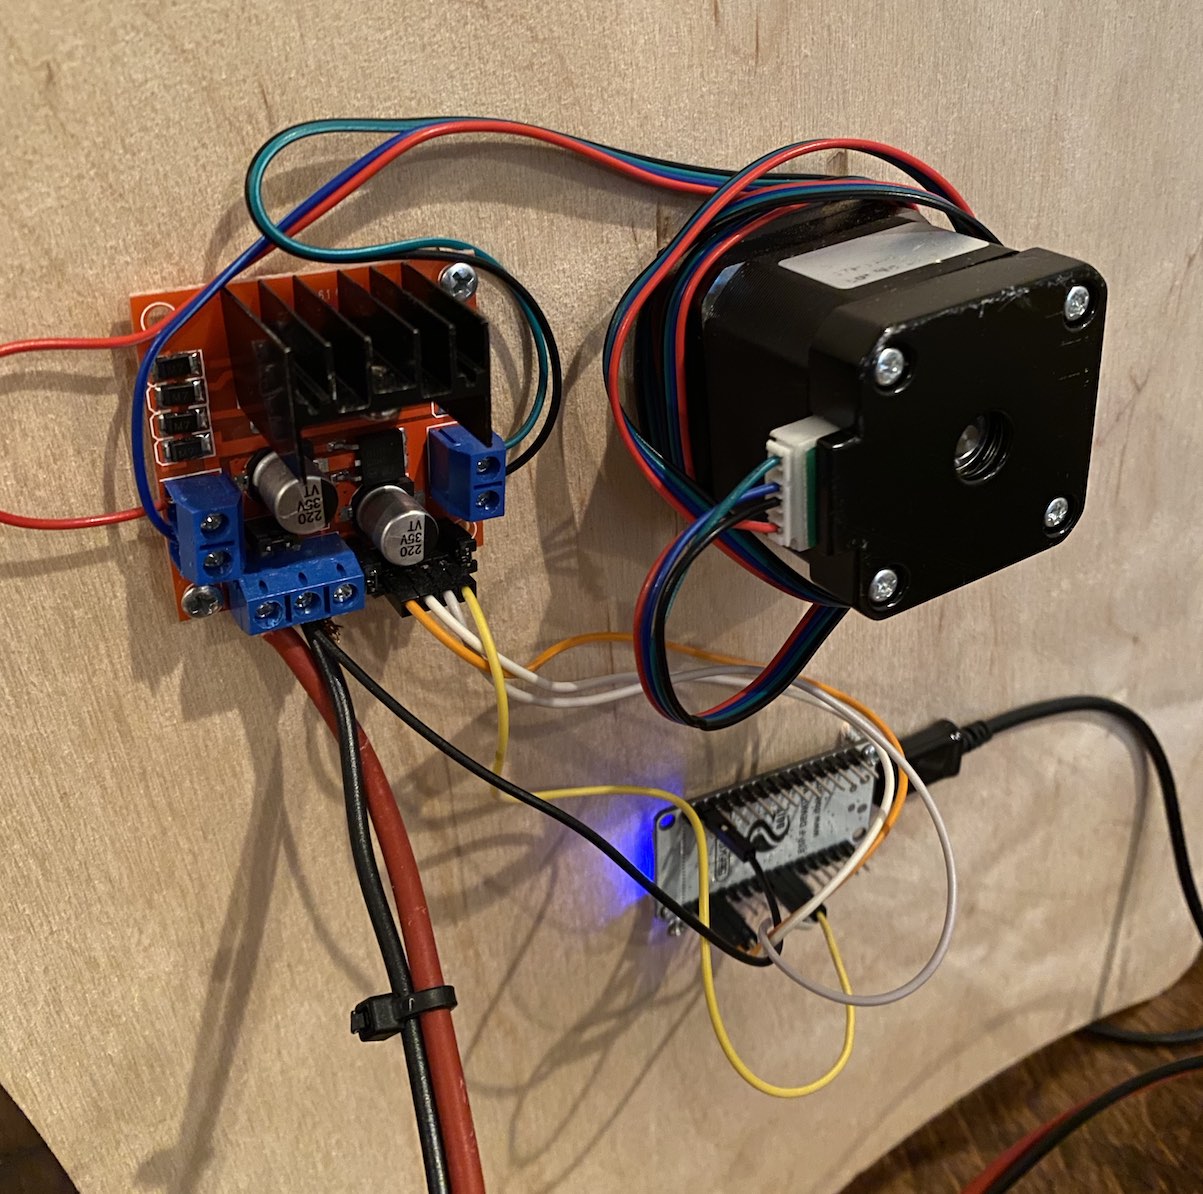
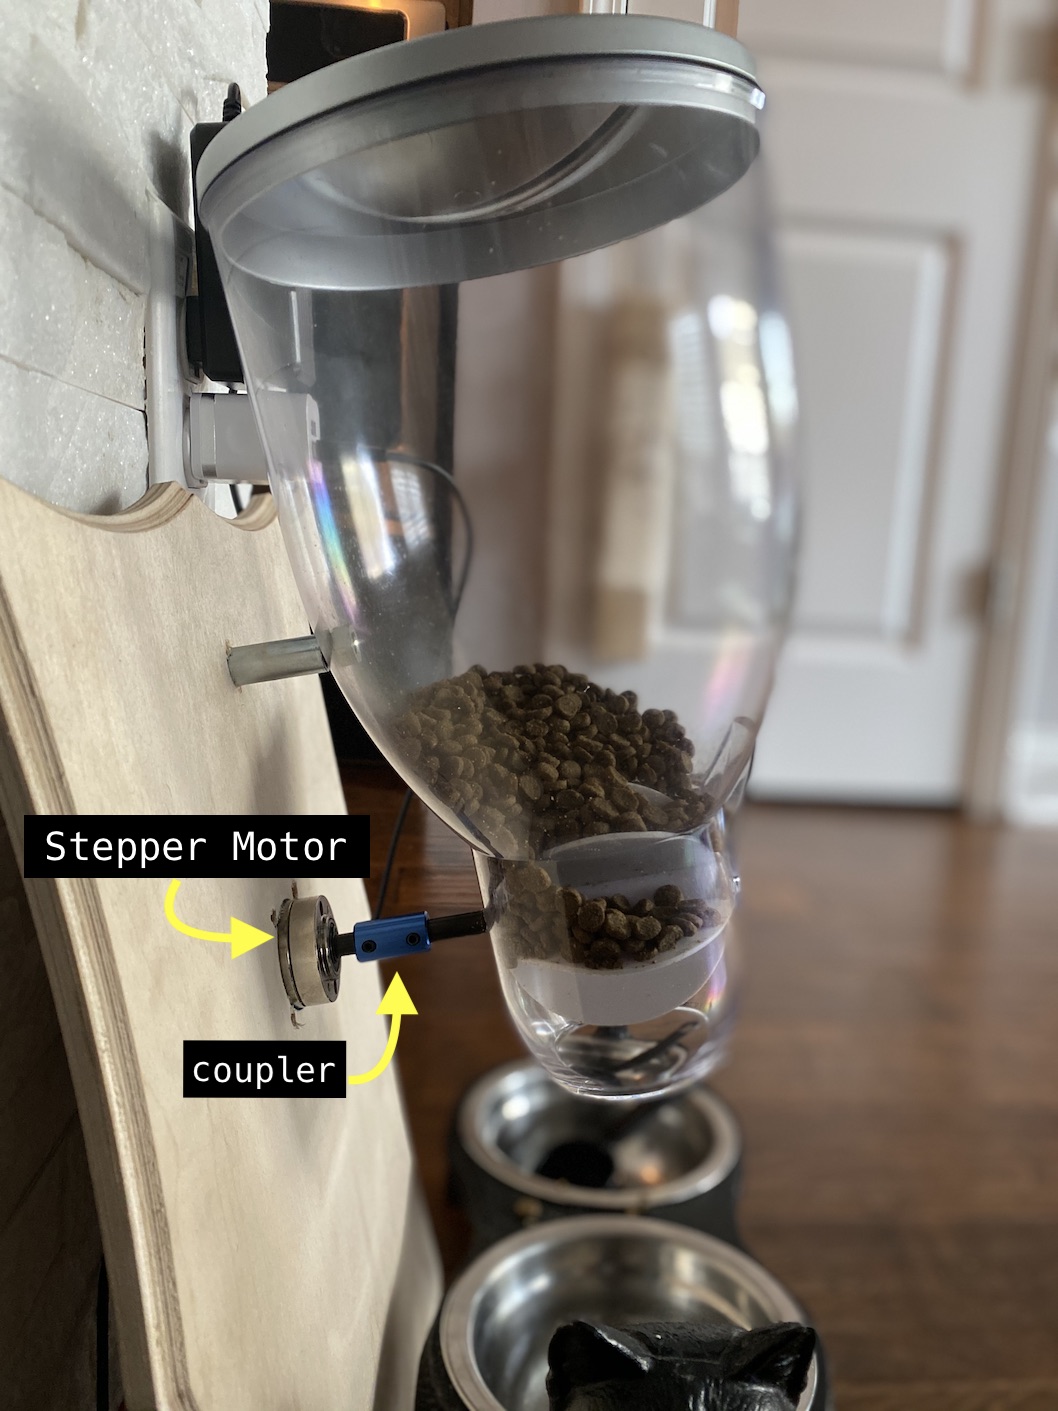
The first step is to modify the cereal dispenser. We'll need to remove the crank-arm that comes attached to the inner turn-wheel. I was able to carefully wiggle mine off. Next, I modified I piece of iron rod by grinding it down to fit the key-hole for the spigot that is attached to the crank-arm. I joined the stepper motor together using this coupler.
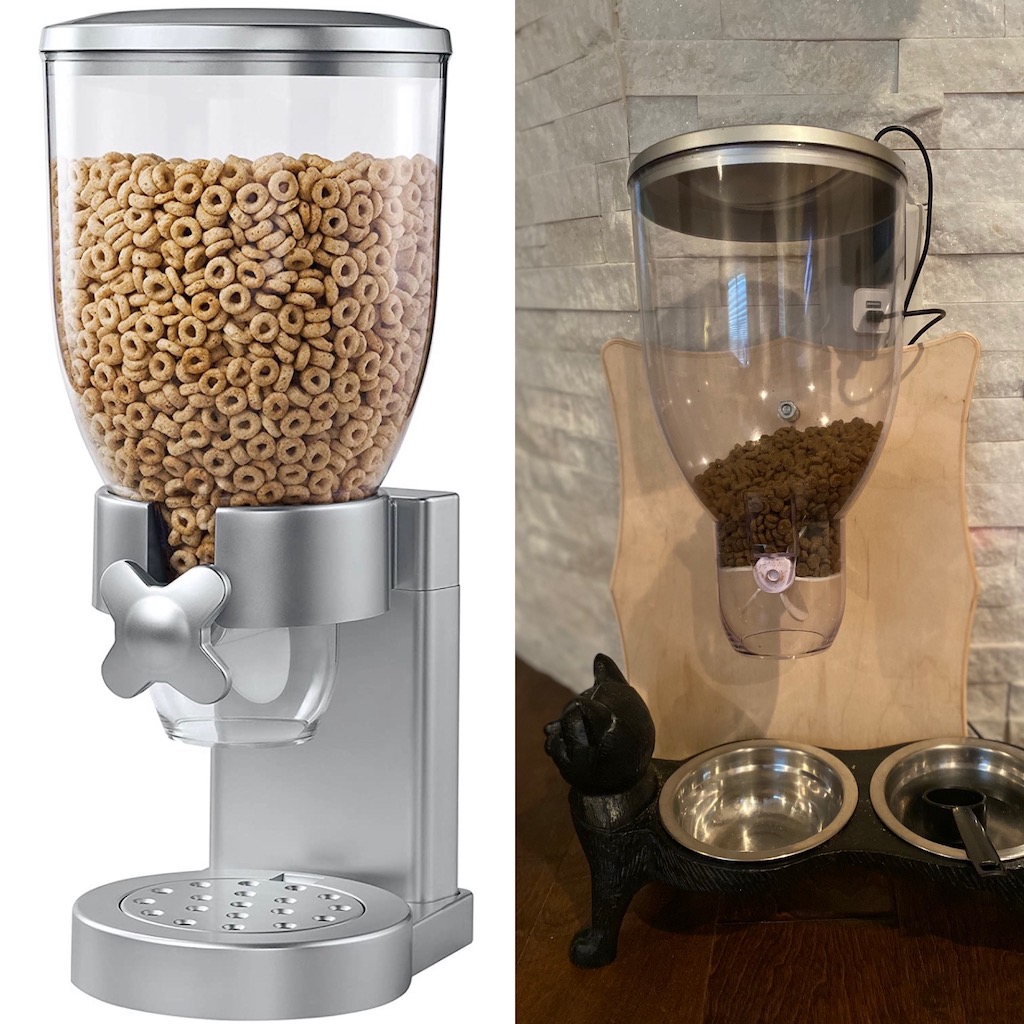
Left: The original dispenser. Right: The modified feeder
The internal turn-wheel needs to be rotated somehow, which is where our stepper motor comes into the picture.
[Stepper Motor]===[metal shaft]===[coupler]===[turn-wheel]
The stepper motor comes with 4 wire leads that get attached to the driver controller (seen above). Next, we need to power the stepper motor driver. Four pins from the ESP8266 GPIO run to the driver. At this point, I had a basic proof of concept for turning the cereal dispenser!
The software
The ESP-8266 is a great micro-controller. For $5, you get a WiFi enabled controller with plenty of GPIO. Check out my first blog post on the ESP-8266! The first thing we'll need to do is setup our Sketch file and import the proper libraries necessary to turn the stepper motor and communicate with AWS.
My sketch file can be located in my GitHub repo! I'll be writing a follow up post that dives deeper into the ~150 lines of code that are used to power this project.
AWS
For anyone looking to build their own feeder, I want to be sure I mention that the AWS (or any cloud provider) is definitely an optional step. If you'd like to avoid this complexity, you could instead just have your ESP-8266 run in a loop and call your own Feed() function at whatever interval is most desirable. There were a couple of different reasons why I ended up choosing AWS for this project:
- Built in security, logging, monitoring, etc.
-
Alexa integration
Alexa, feed Kneesox!
- A fast way to iterate on changes to my device.
This project uses AWS Lambda, CloudWatch, and IoT services.
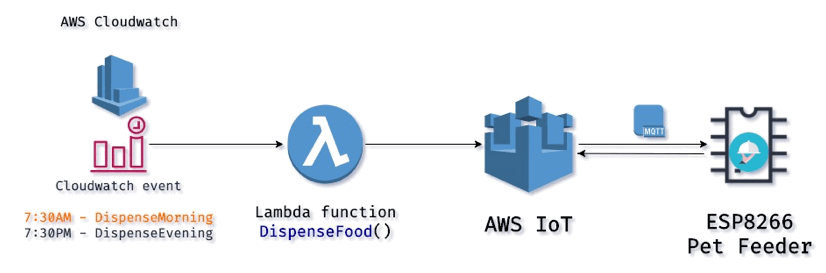
Two cloudwatch events are scheduled to execute twice a day. Each event calls a Lamda function, which contains about 20 lines of Javascript code used to dispatch a message to the ESP-8266
In my next post I'll be discussing how each service is configured!